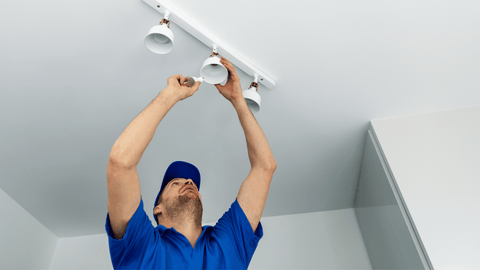
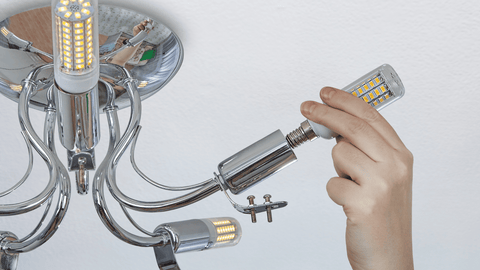
Illuminating your dining room with LED ceiling lights can transform the ambiance of the space, creating a warm and inviting atmosphere for gatherings. Modern ceiling lights for dining room offer a sleek and elegant touch, enhancing the aesthetic appeal of your dining area. Whether you're upgrading your lighting fixtures or embarking on a new installation project, this step-by-step guide will walk you through the process of installing LED chandelier ceiling lights in your dining room.
Also Read: Ditch the Dull Lighting: Upgrade Your Home with Modern LED Chandeliers

Step 1: Plan and Prepare
Begin the installation process by carefully assessing the room's lighting needs, including its dimensions and intended use. Determine the desired lighting ambiance to select the appropriate number of LED fixtures. Having a clear plan ensures an efficient installation process that aligns with your lighting preferences.
Step 2: Marking the Ceiling
Use a stud finder to locate ceiling joists and mark the positions for each fixture on the ceiling. Accurately marking the positions guarantees secure and stable fixture placement.
Step 3: Cut Holes for the Fixtures
Precisely cut holes in the ceiling at the marked positions to accommodate the LED ceiling light fixtures. Ensure the holes are the correct size for seamless fixture fitting, contributing to a professional-looking installation.
Step 4: Wiring
Take care in running electrical wiring from the power source to each fixture location. Seek professional assistance if unfamiliar with electrical work. Properly connect and secure the wires using wire nuts to prevent any potential hazards.
Step 5: Mounting the Fixtures
Gently position each light fixture into the corresponding ceiling hole, following the manufacturer's instructions for secure mounting. Take advantage of clips or brackets included with the LED ceiling lights for easy and stable fixture installation.
Step 6: Test the Lights
Turn on the power supply at the circuit breaker and test each LED ceiling light to ensure operational functionality. Use a voltage tester to identify live wires and address any potential electrical issues before proceeding.
Step 7: Finishing Touches
Add trim or decorative elements provided with the fixtures to enhance the visual appeal of the LED ceiling lights. These finishing touches contribute to a polished and stylish appearance.
Step 8: Clean Up and Enjoy
Conclude the installation process by tidying up any debris or dust from the project area. Appreciate the inviting and energy-efficient glow of the newly installed LED ceiling lights, creating an elevated ambiance and improved functionality for your dining room.
Also Read: Cleaning And Maintaining Chandelier: All You Need To Know
Safety Tips

When it comes to installing modern ceiling lights for dining room, following safety protocols is crucial. Here are some vital tips to keep in mind to ensure a safe installation process:
- Professional Assistance: If you lack electrical wiring experience or feel uncertain about the task, it's advisable to consult a licensed electrician for assistance.
- Power Cutoff: Prior to any fixture installation or removal, it's essential to turn off the power to the circuit. Never attempt to handle a fixture while the wires are live.
- Voltage Testing: Even after shutting off the circuit, there might be live wires in the ceiling box. Use a circuit voltage tester to ensure all wires are safely off.
- Wattage Limit: Avoid exceeding the maximum wattage of the fixture to prevent potential fire hazards.
- Junction Box Support: Confirm that the junction box is capable of supporting the weight of the ceiling fan or fixture. For heavy chandeliers or ceiling fans, secure the hardware to the ceiling joists.
- Assistance Needed: Given the weight of some fixtures, having a partner to assist with holding the fixture while wiring it is advisable.
- Instruction Review: Prior to assembly, carefully read the package instructions for a comprehensive understanding of the installation process.
- Ceiling Fan Precautions: When installing a ceiling fan, ensure the "safety" wire is properly in place.
- Adherence to Local Codes: Always comply with local regulations and guidelines concerning the placement and installation of light fixtures.
Illuminate Your Lighting Experience with Cutesy Home
Discover the world of home décor at Cutesy Home, where you'll find a variety of modern ceiling lights for dining room to brighten up your dining room. From elegant chandeliers to sleek pendant lamps and versatile floor lamps, we offer an extensive selection to elevate your dining experience.
Our LED chandelier ceiling lights create a warm and inviting atmosphere, perfect for cozy gatherings and cherished memories. Explore our range of lighting fixtures, including modern ceiling lights for dining room, pendant lamps, floor lamps, and wall sconces, and see how they can enhance the look and feel of your dining experience and ultimately your entire home.
Conclusion
In conclusion, installing LED ceiling lights in your dining room can enhance the ambiance and functionality of the space. By following the step-by-step guide and adhering to crucial safety tips, you can successfully complete the installation process. Whether you choose contemporary ceiling lights, modern chandeliers, or any other style, ensuring proper wiring, power cutoff, and adherence to local codes is essential. By prioritizing safety and meticulous attention to detail, you can create a well-lit and inviting dining room that elevates the overall aesthetic and functionality of your home.


